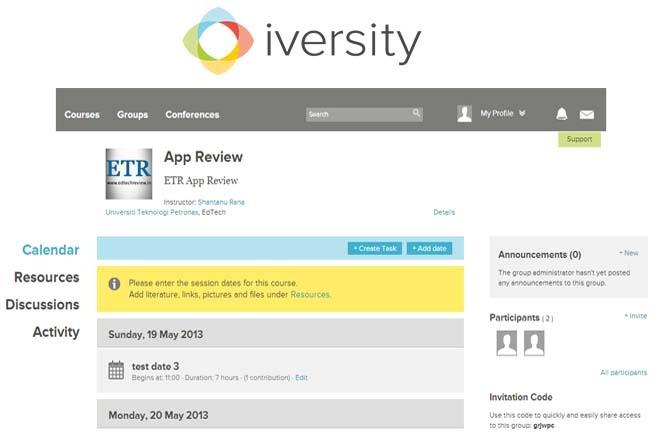
Creating a course is very easy and offers a variety of access options starting with the privacy setting that makes the course accessible to public or hidden from them, going up to the advanced Administrative privileges to assign administrators of the group to manage it. Also, these courses can be assigned to multiple groups and the administrator of the course can put a picture for the course. Once the user clicks next, the second step prompts the user to add event to the calendar with respect to the course being created. The users can skip this step if they don’t want to add anything to the calendar. Finally, the system asks the user to invite additional users to attend the course, by simply typing in the names of the users if they have them as their contacts, by entering the email addresses and inviting them to join, by distributing the course code which can be used anytime to join the respective course or by sharing the link to the course.
Once done, the user is navigated to the course page where the calendar is the default menu that is loaded and all the activities are streamed to the main activity stream. Here, users get all the details of their courses in a very neatly laid interface. By default, ‘Calendar’ is the selected tab streaming all the activities and tasks based on the dates on which they were created. Using this, the Course administrator can create new tasks and date notices for the members. From the ‘Resources’ menu, the users can create course resources to help people who are attending the course. This resource menu helps users to add content like lectures (where they can upload any kind of file and even attach links to amazon.com for other users to make purchases directly in addition to any downloadable material uploaded). Furthermore, the system also allows the user to add additional content like web links, images, videos (Youtube and Vimeo) and any other content type. All this content is displayed in reverse chronological order in the activity stream on the dashboard, while in the course view, the activities are listed in the chronological order.
Any content added to resources under any course can be linked with any task created for that course in the calendar, and the calendar shows all the activities and the linked resources in a chronological order.
Additionally, every user gets a personal work area where they can create a complete personalized learning resource center using features like courses, conferences, resources, personal file systems and more.
When the tasks are open for users to join, the user can simply click the opt-in button directly from the activity stream. Also, the user can start discussions with the collaborators from the stream itself.
Continued on next page…
